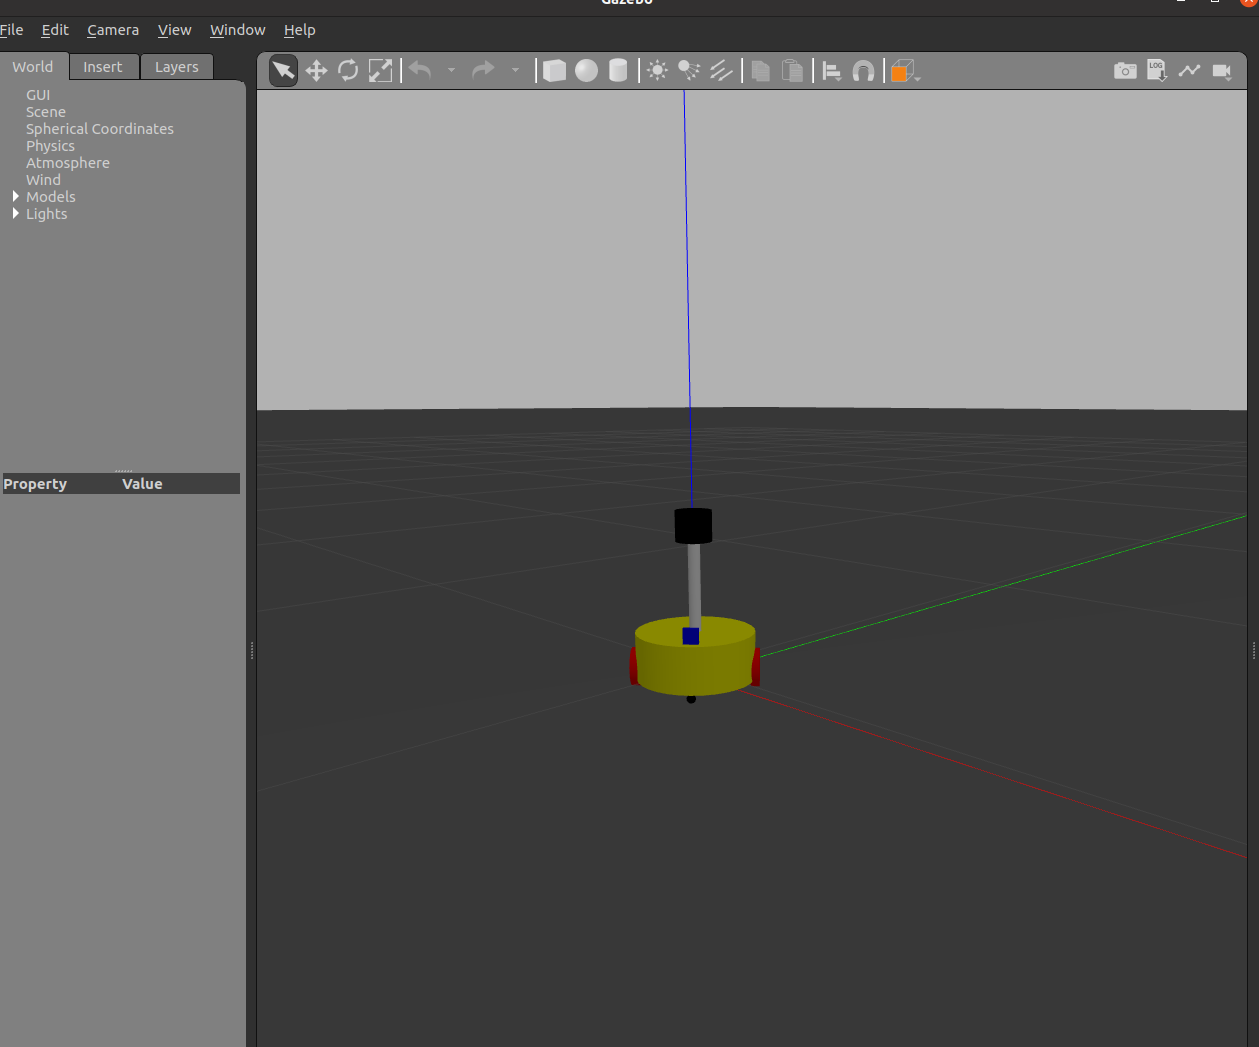
在Gazebo中显示urdf
urdf语法简介
urdf文件是一个标准的xml文件,其中预定义了一系列的标签用于描述机器人模型,主要标签包括:
- robot根标签
- link连杆标签
- joint关节标签
- gazebo标签,用于集成gazebo中的插件,在使用gazebo仿真时会用到,用于配置仿真环境所需要的参数
robot标签
属性name用于指定机器人模型的名字,可以是任意字符串
展开robot标签,内部的都是子级标签
link标签
link标签用于描述机器人某个部件的外观和物理属性,比如机器人底座、轮子、激光雷达、摄像头等等。每一个部件都对应着一个link,在link标签内,可以设计该部件的形状、尺寸、颜色、惯性矩阵、碰撞参数等一系列属性。
name 为部件命名
子标签
- visual 描述可视的外观
- geometry 设置连杆的形状
- box 长方体
- 属性 size=长(x) 宽(y) 高(z)
- cylinder 圆柱
- 属性 radius=半径 length=高度
- sphere 球体
- 属性 radius=半径
- mesh 为连杆添加皮肤
- 属性 filename=资源路径(格式:package://
/ )/文件
- 属性 filename=资源路径(格式:package://
- box 长方体
- geometry 设置连杆的形状
- origin 设置偏移量与倾斜弧度
- 偏移量 xyz=x偏移 y偏移 z偏移
- 倾斜 rpy= r翻滚 p俯仰 yaw偏航(单位弧度)
- material 设置材料属性(颜色)
- name
- color
- collision 连杆的碰撞属性
- inertial 连杆的惯性矩阵
- visual 描述可视的外观
实例
1
2
3
4
5
6
7
8
9
10
11
12
13
14
15
16
17
18
<!-- add base link
参数
形状:圆柱
半径:10 cm
高度:8 cm
离地:1.5 cm
-->
<link name="base_link">
<visual>
<geometry>
<cylinder radius="0.1" length="0.08" />
</geometry>
<origin xyz="0 0 0" rpy="0 0 0" />
<material name="yellow">
<color rgba="0.8 0.3 0.1 0.5" />
</material>
</visual>
</link>
joint标签
joint标签用于描述机器人关节的运动学和动力学属性,还可以指定关节运动的安全极限,机器人的两个link以joint的形式连接,不同的关节有不同的运动形式:旋转、滑动、固定、旋转速度、旋转角速度限制等等。
属性
- name 关节的名字
- type 关节的运动形式
- continuous 旋转关节,绕单轴无限旋转
- revolute 旋转关节,类似continuous,但有角度限制
- prismatic 滑动关节,沿着某一轴线移动的关节,有位置极限
- planer 平面关节,允许在平面正交方向上平移或旋转
- floating 浮动关节,允许进行平移、旋转运动
- fixed 固定关节,不允许运动的特殊关节
子标签
parent(不可省略)
parent link 父级连杆,对应link中的名字
child(不可省略)
child link 子级连杆,对应link中的名字
origin
xyz = 各轴上的偏移量 rpy=绕各轴旋转的弧度
axis
xyz 设置绕哪个轴进行旋转
实例
1
2
3
4
5
6
7
8
9
10
11
12
13
14
15
16
17
18
19
20
21
22
23
24
25
26
27
28
29
30
31
32
33
34
35
36
37
38
39
40
41
42
43
44
45
46
47
48
49
50
51
52
53
54
55
56
57
58
59
60
61
62
63
64
65
66
67
68
69
70
71
72
73
74
75
76
77
78
79
80
81
82
83
84
85
86
87
88
89
90
91
92
93
94
95
96
97
98
99
100
101
102
103
104
105
106
107
108
109
110
111
112
113
114
115
116
117
118
119
120
121
122
123
124
125
126
127
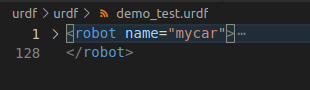
128<robot name="mycar">
<link name="base_footprint">
<visual>
<geometry>
<sphere radius="0.001" />
</geometry>
</visual>
</link>
<!-- add base link
    参数
        形状:圆柱
        半径:10     cm
        高度:8      cm
        离地:1.5    cm
-->
<link name="base_link">
    <visual>
        <geometry>
            <cylinder radius="0.1" length="0.08" />
        </geometry>
        <origin xyz="0 0 0" rpy="0 0 0" />
        <material name="yellow">
            <color rgba="0.8 0.3 0.1 0.5" />
        </material>
    </visual>
</link>
<joint name="base_link2base_footprint" type="fixed">
<parent link="base_footprint" />
<child link="base_link" />
<origin xyz="0 0 0.055" />
</joint>
<!-- add drive wheel
驱动轮是侧翻的圆柱
参数
半径: 3.25 cm
宽度: 1.5 cm
颜色: 黑色
关节设置:
x = 0
y = 底盘的半径 + 轮胎宽度 / 2
z = 离地间距 + 底盘长度 / 2 - 轮胎半径 = 1.5 + 4 - 3.25 = 2.25(cm)
axis = 0 1 0
-->
<link name="left_wheel">
<visual>
<geometry>
<cylinder radius="0.0325" length="0.015" />
</geometry>
<origin xyz="0 0 0" rpy="1.5705 0 0" />
<material name="black">
<color rgba="0.0 0.0 0.0 1.0" />
</material>
</visual>
</link>
<joint name="left_wheel2base_link" type="continuous">
<parent link="base_link" />
<child link="left_wheel" />
<origin xyz="0 0.1 -0.0225" />
<axis xyz="0 1 0" />
</joint>
<link name="right_wheel">
<visual>
<geometry>
<cylinder radius="0.0325" length="0.015" />
</geometry>
<origin xyz="0 0 0" rpy="1.5705 0 0" />
<material name="black">
<color rgba="0.0 0.0 0.0 1.0" />
</material>
</visual>
</link>
<joint name="right_wheel2base_link" type="continuous">
<parent link="base_link" />
<child link="right_wheel" />
<origin xyz="0 -0.1 -0.0225" />
<axis xyz="0 1 0" />
</joint>
<!-- add support wheel
参数
形状: 球体
半径: 0.75 cm
颜色: 黑色
关节设置:
x = 自定义(底盘半径 - 万向轮半径) = 0.1 - 0.0075 = 0.0925(cm)
y = 0
z = 底盘长度 / 2 + 离地间距 / 2 = 0.08 / 2 + 0.015 / 2 = 0.0475
axis= 1 1 1
-->
<link name="front_wheel">
<visual>
<geometry>
<sphere radius="0.0075" />
</geometry>
<origin xyz="0 0 0" rpy="0 0 0" />
<material name="black">
<color rgba="0.0 0.0 0.0 1.0" />
</material>
</visual>
</link>
<joint name="front_wheel2base_link" type="continuous">
<parent link="base_link" />
<child link="front_wheel" />
<origin xyz="0.0925 0 -0.0475" />
<axis xyz="1 1 1" />
</joint>
<link name="back_wheel">
<visual>
<geometry>
<sphere radius="0.0075" />
</geometry>
<origin xyz="0 0 0" rpy="0 0 0" />
<material name="black">
<color rgba="0.0 0.0 0.0 1.0" />
</material>
</visual>
</link>
<joint name="back_wheel2base_link" type="continuous">
<parent link="base_link" />
<child link="back_wheel" />
<origin xyz="-0.0925 0 -0.0475" />
<axis xyz="1 1 1" />
</joint>
</robot>
在Gazebo中使用urdf
urdf适配Gazebo
不同于在rviz中解析urdf文件,如果需要在Gazebo中使用urdf,需要完成以下几个环节
- 必须在link标签内使用inertial标签,此标签标注了机器人某个刚体部件的惯性矩阵,用于一些力学相关的仿真计算
- 必须在link标签内使用collision标签,用于提供碰撞检测的依据
- 可以在link标签内使用gazebo标签,作用如下
- 将颜色转化为Gazebo支持的格式
- 将stl文件转化为dae文件以获得更优的皮肤效果
- 添加传感器插件
- 可以在joint标签内使用gazebo标签,作用如下
- 添加执行器控制插件
- 设置合适的阻尼(动力学相关)
- 可以在robot标签内使用gazebo标签
- 可以添加如的link标签,这样机器人会被严格的连接到一个世界中
总之,gazebo标签是对urdf格式的扩展,它允许指定出现在sdf格式却没有被包含在urdf格式中的多种属性。目前有三种不同类型的gazebo标签,一种用于robot标签内,一种用于link标签内,还有一种用于joint标签内。我们将在后面展开讨论。
简单的实例
1 | <!-- |
启动Gazebo并显示模型
1 | import os |
解释:
解析urdf文件,并将其内容加载到参数服务器
1 | Node( |
利用gazebo_ros_pkgs中的功能包孵化机器人模型
1 | Node(package='gazebo_ros', executable='spawn_entity.py', |
urdf新增标签详解
collision
collision表示碰撞蚕食。如果机器人link是标准的几何形状,和link中的visual标签内容可以保持一致(复制,粘贴即可)
inertial
inertial表示惯性矩阵。为了让Gazebo的物理引擎能正常工作,必须提供inertial标签。惯性矩阵的设置需要结合link标签中的质量和外形参数动态生成。link标签中的质量必须大于。如果存在任何的扭矩,如果惯性矩阵的主惯性矩为0,会导致无限加速的问题。通常惯性矩阵需要通过对机器人部件进行测量或者通过CAD软件进行近似来获得。以下是PRBot的一个例子:
1 | <inertial> |
实际使用中,我们已经封装好了标准的球体、圆柱与立方体的惯性矩阵公式(以xacro来实现),可以在使用中直接copy:
球体的惯性矩阵
1 | <!-- Macro for inertia matrix --> |
圆柱的惯性矩阵
1 | <xacro:macro name="cylinder_inertial_matrix" params="m r h"> |
立方体的惯性矩阵
1 | <xacro:macro name="Box_inertial_matrix" params="m l w h"> |
gazebo
link中的gazebo
| 名称 | 类型 | 描述 |
|---|---|---|
| material | value | Material of visual element |
| gravity | bool | Use gravity |
| dampingFactor | double | 连杆速度的指数速度衰减 |
| maxVel | double | Exponential velocity decay of the link velocity - takes the value and multiplies the previous link velocity by (1-dampingFactor). |
| minDepth | double | minimum allowable depth before contact correction impulse is applied |
| mu1 | double | Friction coefficients μ for the principal contact directions along the contact surface as defined by the Open Dynamics Engine (ODE) (see parameter descriptions in ODE’s user guide) |
| mu2 | double | same as above |
| fdir1 | string | 3-tuple specifying direction of mu1 in the collision local reference frame. |
| kp | double | Contact stiffness k_p and damping k_d for rigid body contacts as defined by ODE (ODE uses erp and cfm but there is a mapping between erp/cfm and stiffness/damping) |
| kd | double | same as above |
| selfCollide | bool | If true, the link can collide with other links in the model. |
| maxContacts | int | Maximum number of contacts allowed between two entities. This value overrides the max_contacts element defined in physics. |
| laserRetro | double | intensity value returned by laser sensor. |
joint中的gazebo
| 名称 | 类型 | 描述 |
|---|---|---|
| stopCfm | double | Joint stop constraint force mixing (cfm) and error reduction parameter (erp) used by ODE |
| stopErp | double | same as above |
| provideFeedback | bool | Allows joints to publish their wrench data (force-torque) via a Gazebo plugin |
| implicitSpringDamper | bool | If this flag is set to true, ODE will use ERP and CFM to simulate damping. This is a more stable numerical method for damping than the default damping tag. The cfmDamping element is deprecated and should be changed to implicitSpringDamper. |
| springStiffness | bool | same as above |
| springReference | double | Equilibrium position for the spring. |
| cfmDamping | double | same as above |
| fudgeFactor | double | Scale the excess for in a joint motor at joint limits. Should be between zero and one. |
robot中的gazebo
如果gazebo标签没有与属性reference=“”连用,那么意味着gazebo标签属于整个robot
| 名称 | 类型 | 描述 |
|---|---|---|
| static | bool | if set to true, the model is immovable. Otherwise the model is simulated in the dynamics engine. |
urdf实操例子
在实操中,我们采用xacro语法进行编写
1.编写封装了惯性矩阵算法的xacro文件 gazebo_demo_laser.xacro
1 | <robot name="base" xmlns:xacro="http://wiki.ros.org/xacro"> |
2.设计机器人的底盘 gazebo_demo_car_base.xacro
1 | <!-- 根标签,必须声明 xmlns:xacro --> |
3.给机器人添加摄像头 gazebo_demo_camera.xacro
1 | <robot name="my_camera" xmlns:xacro="http://wiki.ros.org/xacro"> |
4.给机器人添加雷达 gazebo_demo_laser.xacro
1 | <!-- |
5.搭建整个机器人的框架
1 | <robot name="mycar" xmlns:xacro="http://www.ros.org/wiki/xacro"> |
6.编写launch文件
1 | import os |
显示结果如下